How to create an event
In this section, you’ll learn how to create an event in PowerStudio Wave step by step. Plus, at each step, you can access all the detailed information from each section.
Step 1: Create an event
On the main event screen, you can create a new event by clicking on the “New” button on the toolbar.

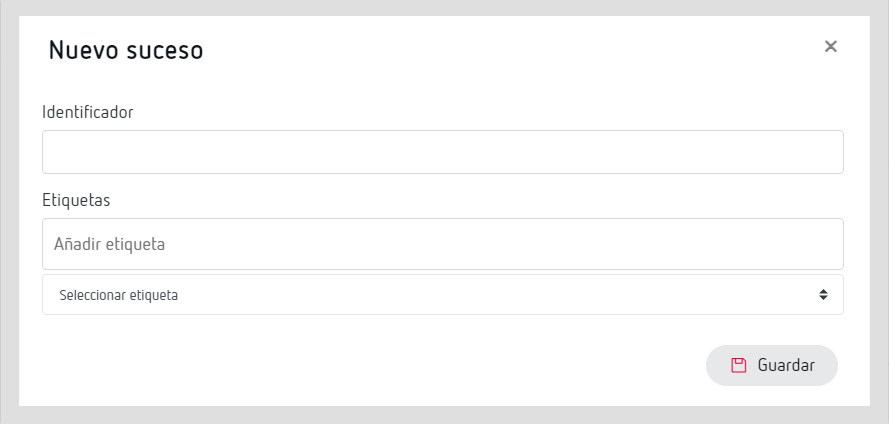
Step 2: Basic data
On the event creation screen, the first thing you should do it do give it a name. You can also create and add categories to organise your events and more easily filter them. To continue, click on the “Save” button.
Step 3: Editing mode
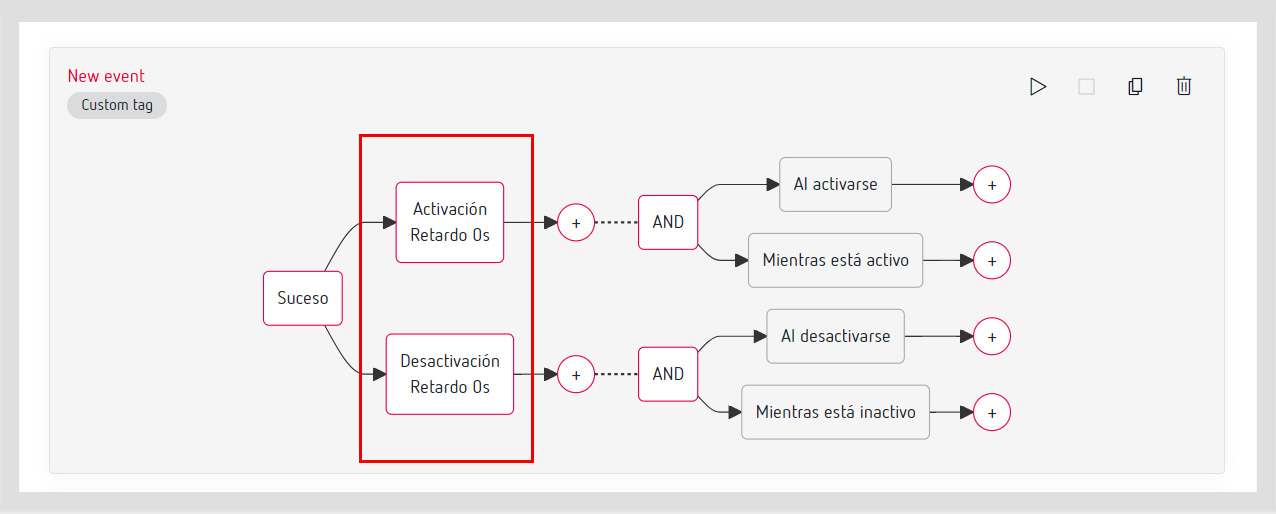
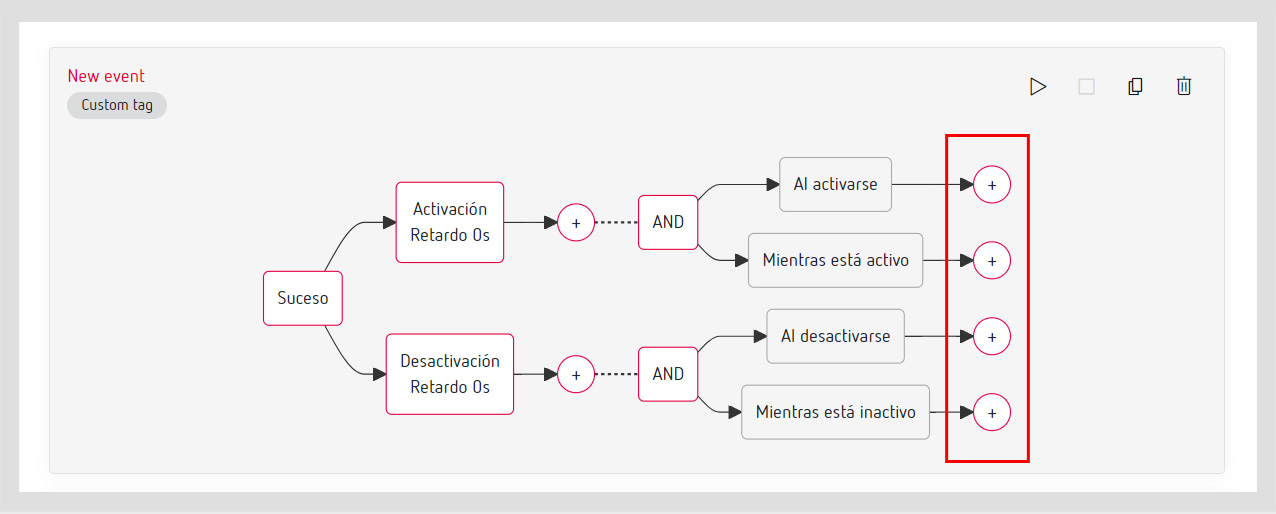
When you create an event, it will appear in "stand-by” status. The event diagram in “stand-by” status is displayed differently. In this status, you can edit the event diagram. Plus, the options on the upper right part of the event are activated (duplicate, delete, etc.).

Step 4: Stand-by
In the first nodes of the diagram, you can configure the stand-by both in the activation and in the deactivation of the event. To do so, click on the node and configure the stand-by in seconds.
You can see more detailed information on the stand-by node.
Step 5: Conditions
In the condition nodes, you can configure the conditions that must be met for the event to be activated. To do so, click on the node with the (+) symbol and configure the conditions. The conditions are expressed in the expressions editor, and variables and/or logical expressions can be used.
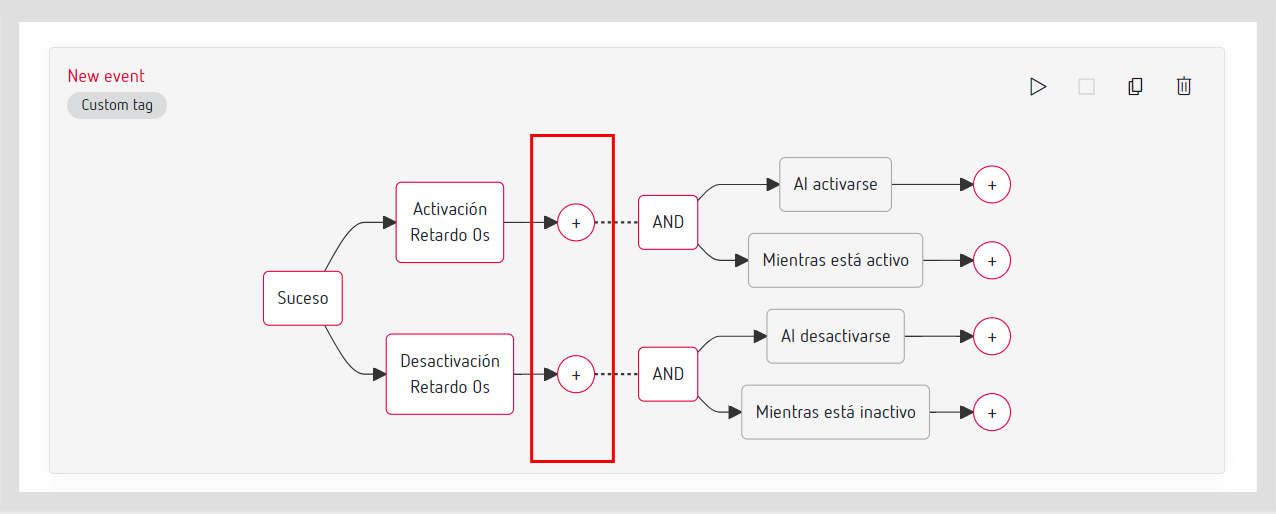
You can see more detailed information on the condition node.
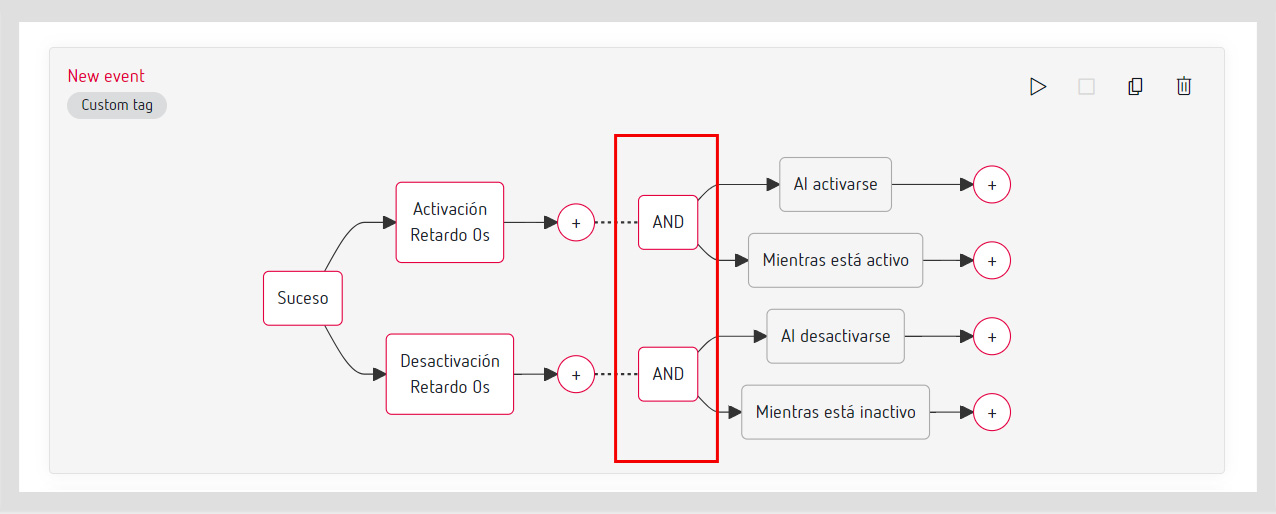
Step 6: Operator
In the operator node, you can choose whether the operator is “AND” or “OR”. To do so, click on the node and choose the operator you want. The operator will act on all the prior conditions by applying the chosen operator.
Step 7: Actions
From each main line (in the activation and deactivation) and after the conditions, you can configure actions when it is first activated or while it is active. In each of these branches, you can create or modify the actions to be run in each case.
There are three kinds of actions:
- Forcing a variable
- Sending an email
- Sending a Telegram message
Each of the actions has its own configuration screen.
You can check detailed information on the actions.
Step 8: Initiate the event
Once the event is configured, it should be initiated so that it begins to evaluate and run the actions, if needed. To initiate an event, all you have to do is click on the “play” icon of the event’s actions. While an event is on stand-by, it can be edited, duplicated or deleted.

An initiated event is displayed in a different colour and cannot be edited. To edit an initiated event, you first have to stop it with the “stop” icon.
