Event actions
What are event actions?
An action is the outcome of running an event in Wave. This action will be carried out when an event is fulfilled or ceases being fulfilled, as defined by a user.
How to event actions work in PowerStudio Wave?
First you have to generate a condition to run that action, which we shall define below.
Let us use an example to better explain it.
If a device's active energy is less than or equal to 0, then it will send an alert email so that you know that this device is not operating:
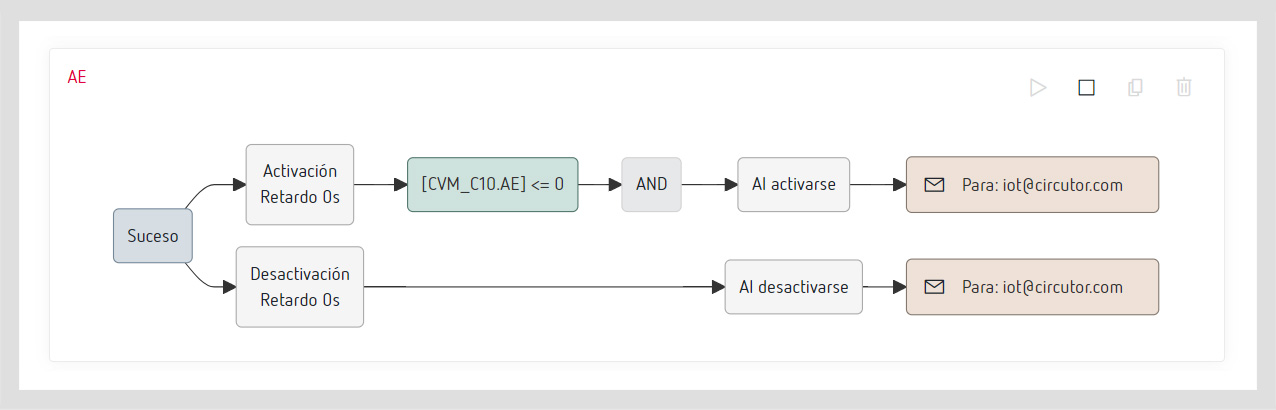
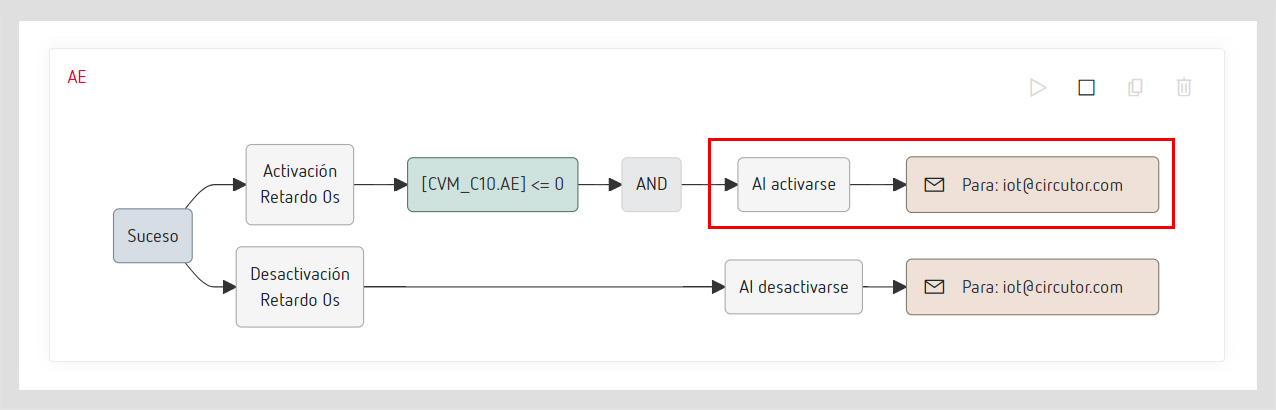
In this case, you have an event which will be activated if the active energy of the device CVM-C10 reaches 0, and what it will do in this case is send an alert email to the address iot@circutor.com.
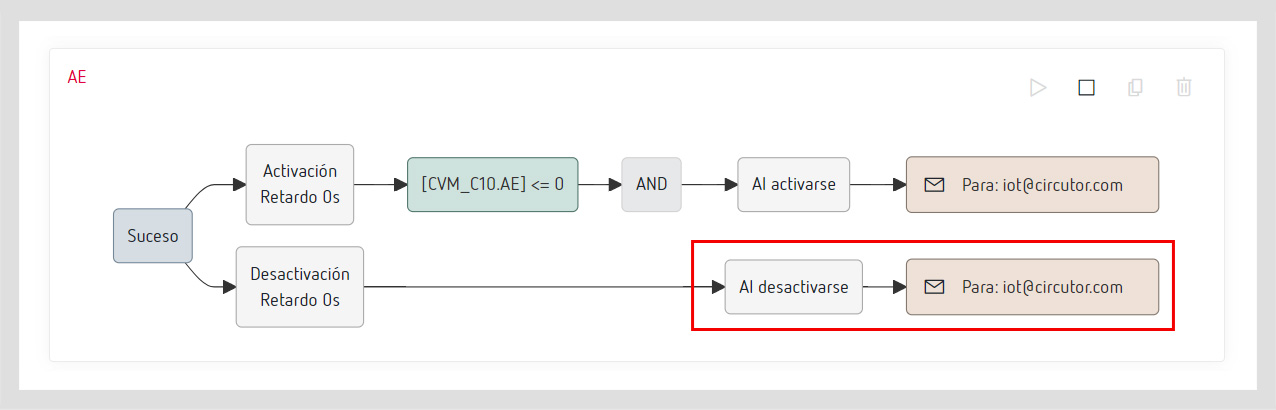
If the device's energy is restored and therefore its value is no longer at 0, you have determined that it should send you an alert email so that you know that it has energy again.
Activation criteria
There are 4 possible activation criteria when creating an event:
-
When activated: This is the action run when the event you have defined is true and the activation delay time defined previously has been fulfilled.
-
While active: This is the action run as long as the event you have defined is true and the activation delay time defined previously has been fulfilled.
-
When deactivated: This is the action run as soon as the event you have defined is no longer fulfilled (it is false) and the activation stand-by time defined previously has been.
-
While inactive: This is the action run as long as the event you have defined is false and the activation stand-by time defined previously has been fulfilled.
Types of actions
These are the different actions in the events in Power Studio Wave:
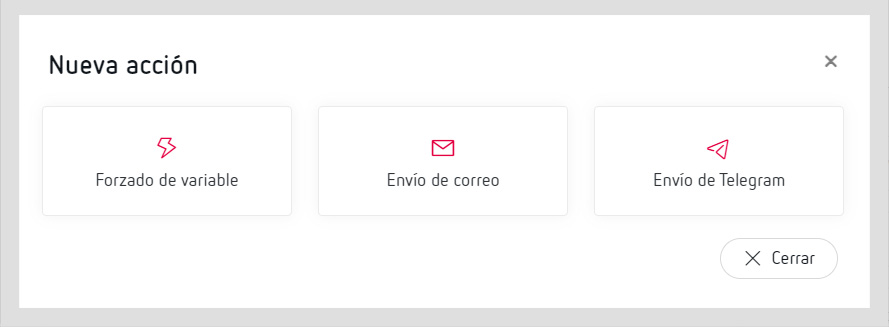
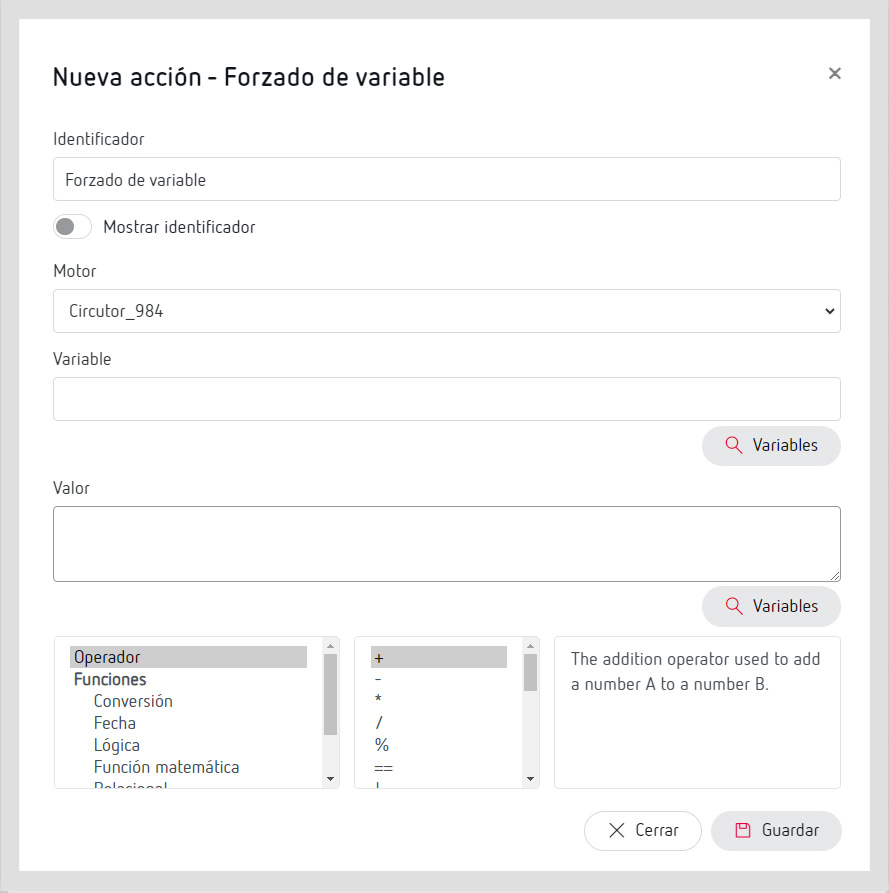
Variable forcing
Variable forcing, as its name implies, is used to force the running of a variable of a device. In this case, for example, it will be if a function opens an EDS relay (in this case, you should know that the open state of a relay is 0 and a closed state is 1).
-
Identifier: This is a tool used to show the forceable variable as simply and understandably as possible. You should choose the “Show identifier” option to see it onscreen:
-
Engine: This is the engine where the forceable variable should be, in this case.
-
Variable: The variable you define which is run when the event is fulfilled or ceases being fulfilled depending on what you have previously defined. There is a wizard button so that the variable does not have to be manually written.
-
Value: This is where you write the result of the forceable variable. In this case, the value is 0 and it will open the relay.
Send email
Thanks to this option, you can send emails from PowerStudio Wave to the email addresses indicated as alarms, if, for example, you cease having communication with a device or a device is showing values that are incorrect according to your criteria.

!!! warning “Important”
Before beginning this part, it is important to configure the email server. You can check this information in the [email setting](/en/modules/settings/comms) section.
-
Identifier: This is a tool used to show the forceable variable as simply and understandably as possible. Choose the “Show identifier” option to see it onscreen.
-
From: This is the email address from which you’ll send that email, which you have previously defined in the Communications section.
-
To: The email address(es) where you are going to send the email.
Information
Separate emails by “,” without leaving spaces
-
Subject: The subject of the email.
-
Message: The content of the email you will receive.
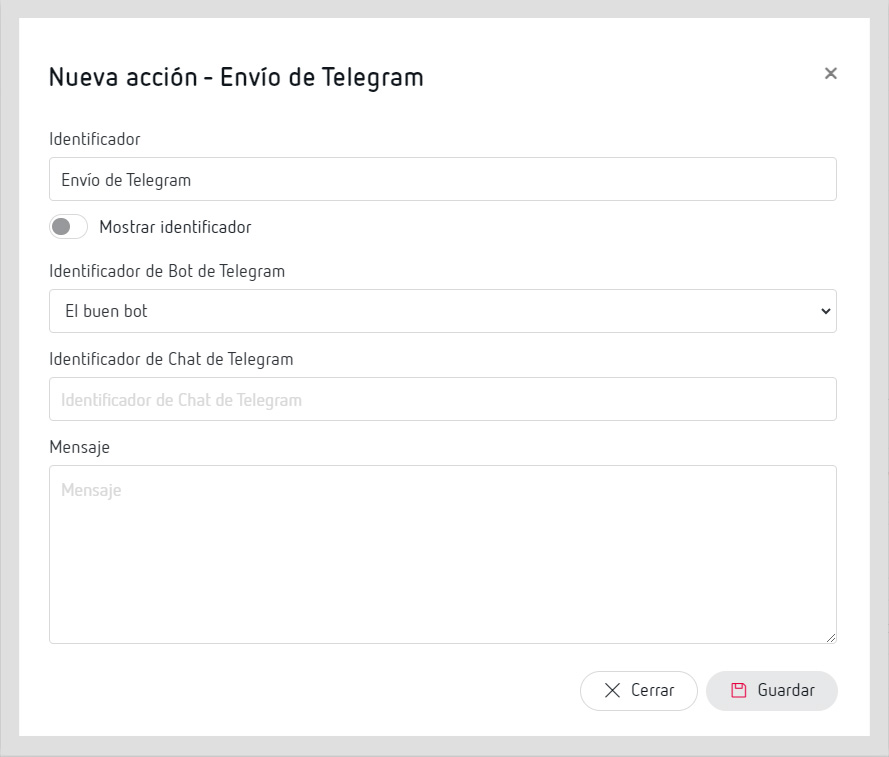
Send Telegram
With this tool, you can send alerts to the Telegram chat of your choice. To do so, create a Telegram bot and get that bot's token. To see the configuration of Telegram, please see the configuration of Telegram section.
-
Identifier: This is a tool used to show the forceable variable as simply and understandably as possible. Choose the “Show identifier” option to see it onscreen.
-
Identifier of the Telegram Bot: Here you should choose the Telegram bot previously created.
-
Message: The alert message which will reach the Telegram hat.